

The Best Ways to Remove Varnish, Lacquer and Paint from Wood Furniture
The first step in any furniture makeover is removing the old finish, but there’s no one-size-fits-all method. Choosing the right approach saves time and frustration. Here I will tell you all my favourite methods of removing stubborn finishes, along with my favourite products! Want to skip to the shopping list?
Method 1 – Cleaning + Sanding

This method is ideal for light finishes and worn surfaces. If you have a piece of furniture that looks seriously worn down, you may not need to pull out the heavy duty strippers and fancy scrapers. If all you have available to you is an orbital sander (I love this one), you are more than capable to remove that varnish.
I am going to add an extension (literally) to the sander. If you have a shop vac, it is SO helpful to purchase a hose attachment for your sander. If you are doing a one off furniture makeover, you could very well skip this step. But if flipping is becoming your thing, but you aren’t ready to spend upwards of $1000 on the fancy sanders (like Surf Prep or Festool), a simple hose attachment is a lifesaver. Cleaning up all of the dust from sanding can get super messy. So that said, if you don’t have a hose attachment, purchasing proper PPE is also going to help - and make sure you are in a well ventilated space.
After cleaning with TSP (this is my favourite one), start with an 80 grit sandpaper.
As an Amazon Associate, I earn commissions from qualifying purchases.
I’m going to 🛑 STOP here quick and say - if you are working with veneer, I STRONGLY advise that you DO NOT start with 80 grit! You will risk burning through your veneer and ruining your wood.
You will then work your way up using 120, 180, and finishing with 220 grit. Yes it seams daunting, but the first round of sanding is usually the most time consuming. I don’t usually completely remove the finish with 80 grit, as you will end up with swirl marks on your wood. The goal is to make the wood look smooth and natural. The 80 grit is meant to remove any heavy lacquer or top coats. If you are getting down to raw wood really quick, maybe try starting with 120 and work up from there.
Pro Tip - Once you feel good about your sanding process, use a wet cloth along the surface and take a look to see if there are any swirls.
Method 2 – Carbide Scraper

This method is a workout - but is so satisfying to do. This is a tool I reach for at some point in every project. It works fantastic for flat surfaces, as seen above. You can also use this on tight edges and lips where it can get tricky with a sander or manually with sand paper.
You can find this Carbide Scraper here. Once the blade goes dull, you can always order blade replacements as well! The sharper the blade, the quicker you can remove the surface.
While it is significantly less smelly and not as gooey as using a stripper, it still kicks up a TON of dust, so using PPE is advised, and have your shop vac close by to catch flying flakes of finish.
Method 3 – Furniture Stripper

← This is my favourite brand!
Circa 1850 in GEL consistency is my go-to. It isn’t a runny liquid, the smell is significantly tolerable compared to others I have used - and the gel consistency is so much better to keep in a thick layer.
Using a furniture stripper is a great method for removing thick varnish, paint, or lacquer. This method is much fast than the previous two, but requires proper safety gear and ventilation.
When applying this stripper, use a metal scraper. After 15 minutes, scrape the stripper off into a bin. You will also need the scraper when you remove the excess as well. Again, don’t forget your PPE, and some utility gloves so you don’t burn your skin.
After the stripper is removed, wipe down the surface with either TSP or Mineral Spirits and a lint free cloth.
Additional Method Shoutouts!
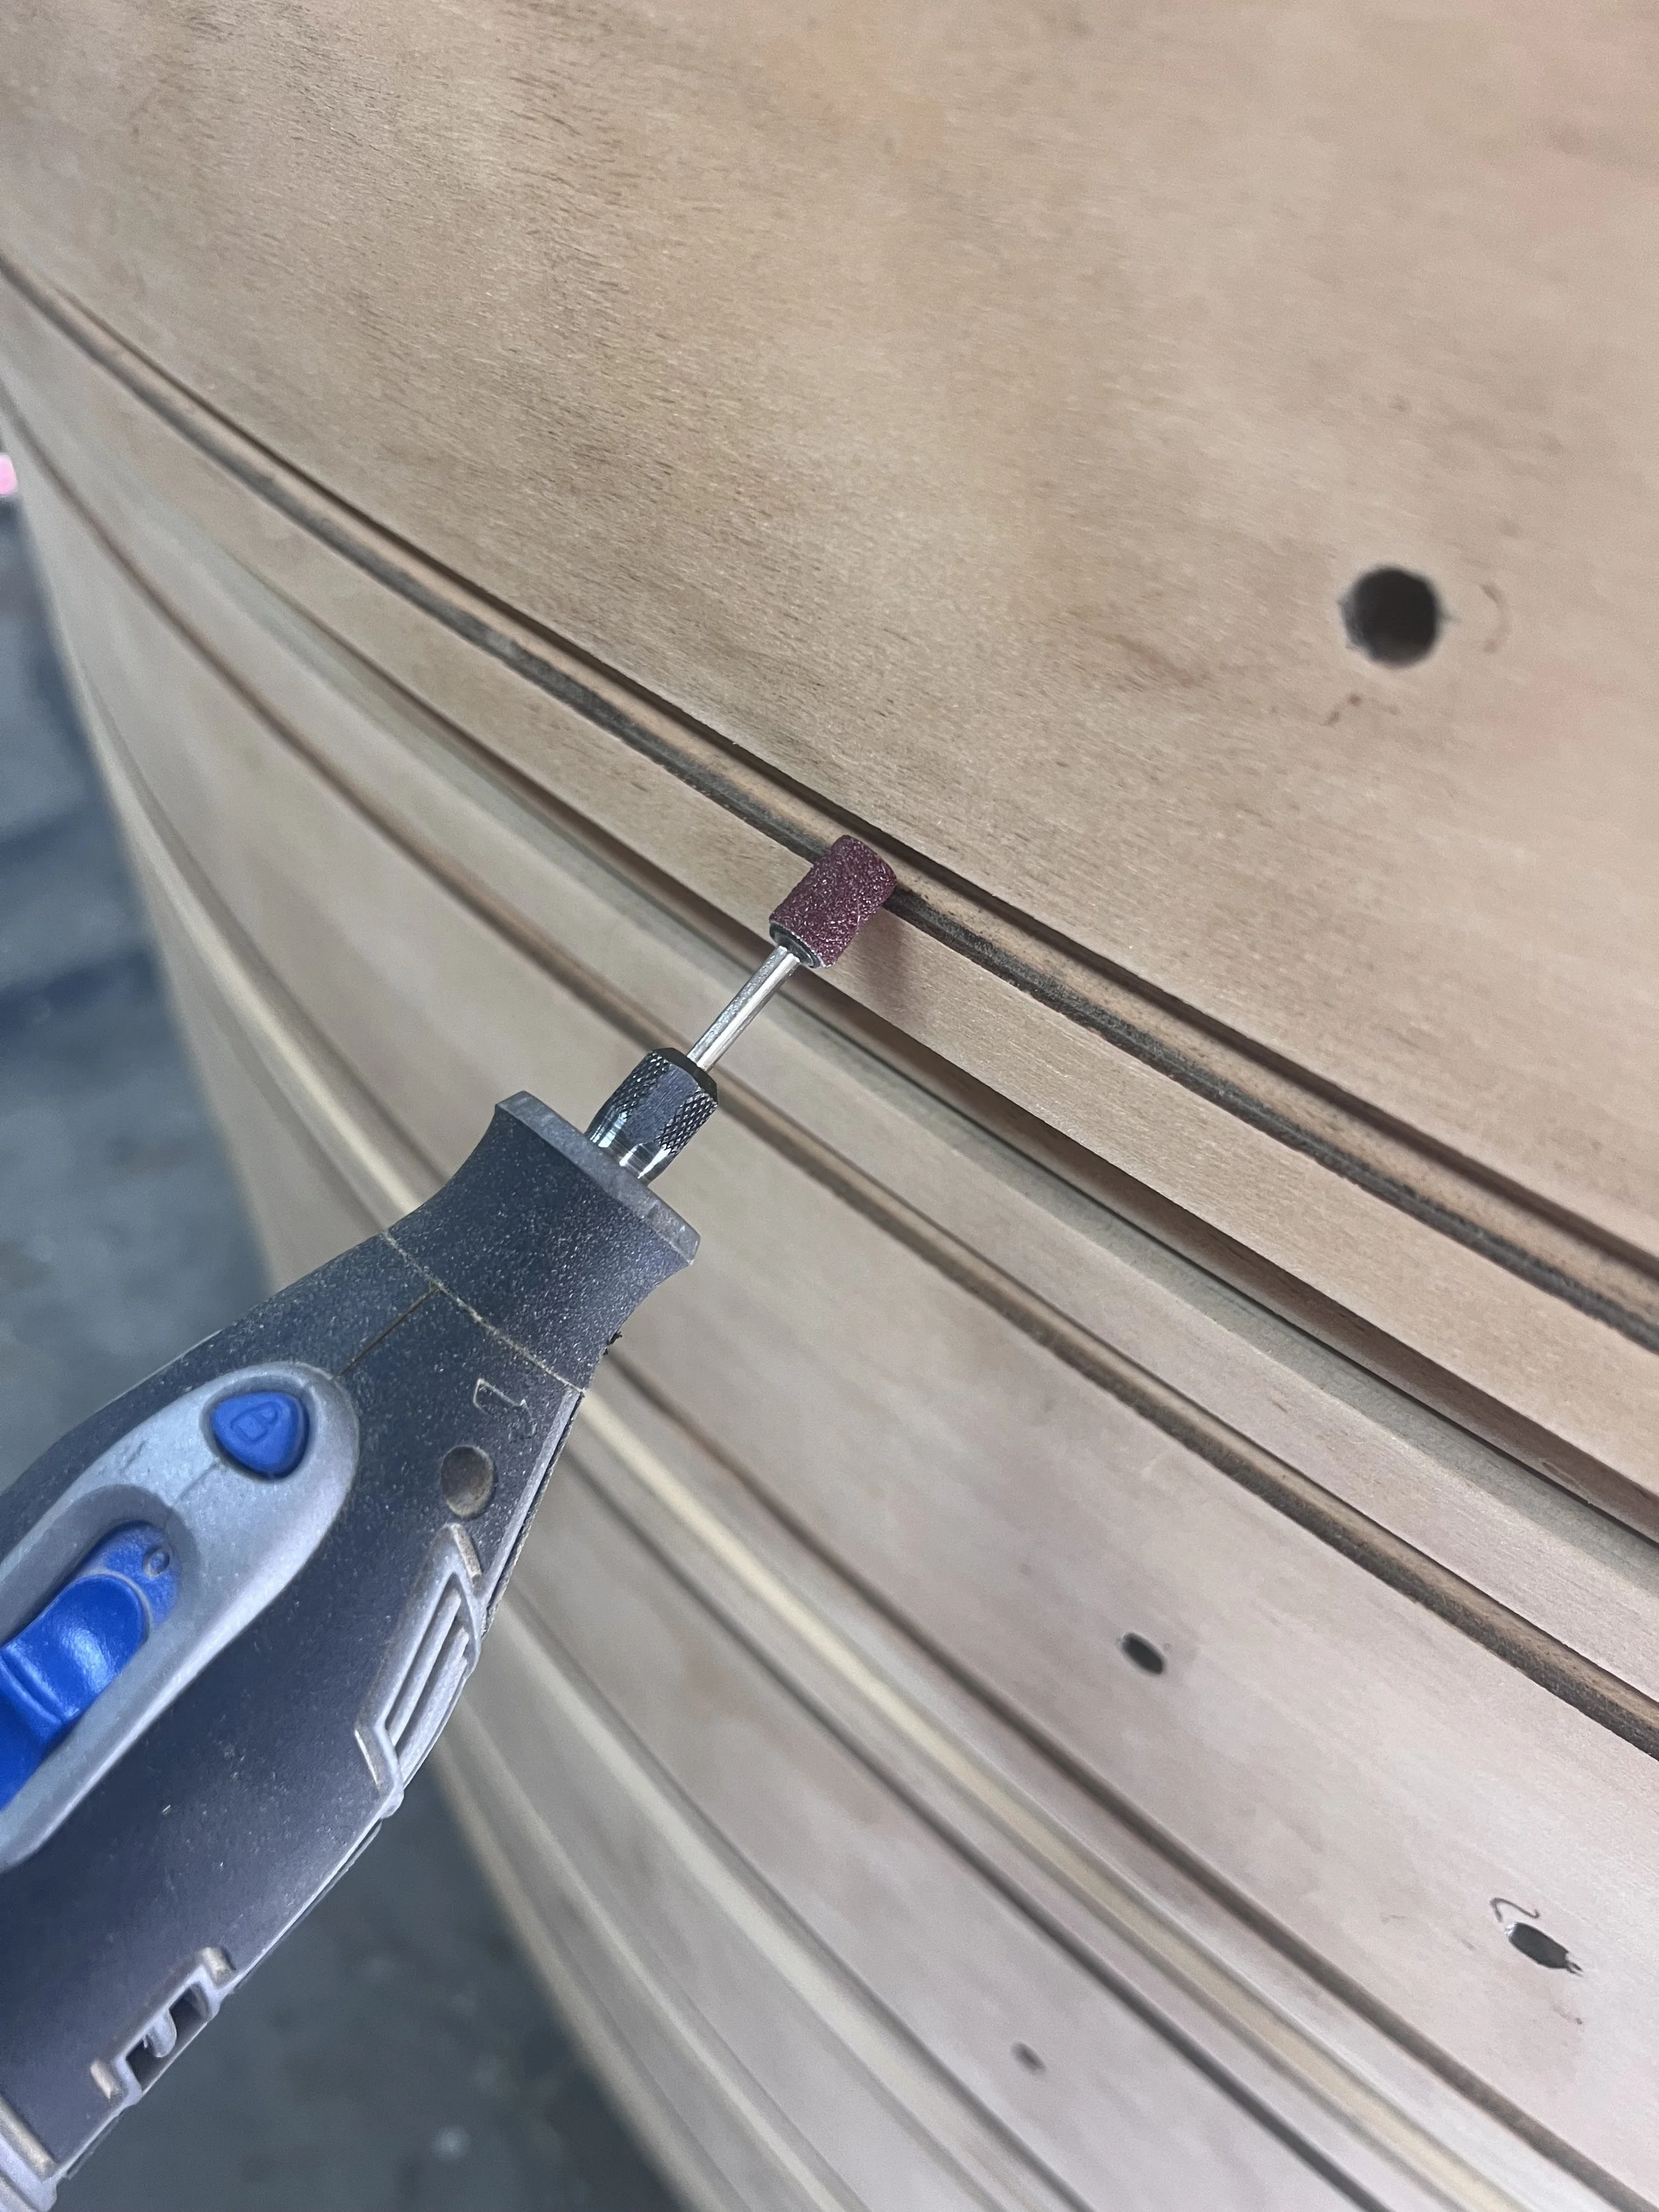
Dremel. It is great for rounded details like spindles, or grooves. You can also purchase different abbrasion pieces so you get a smooth finish.
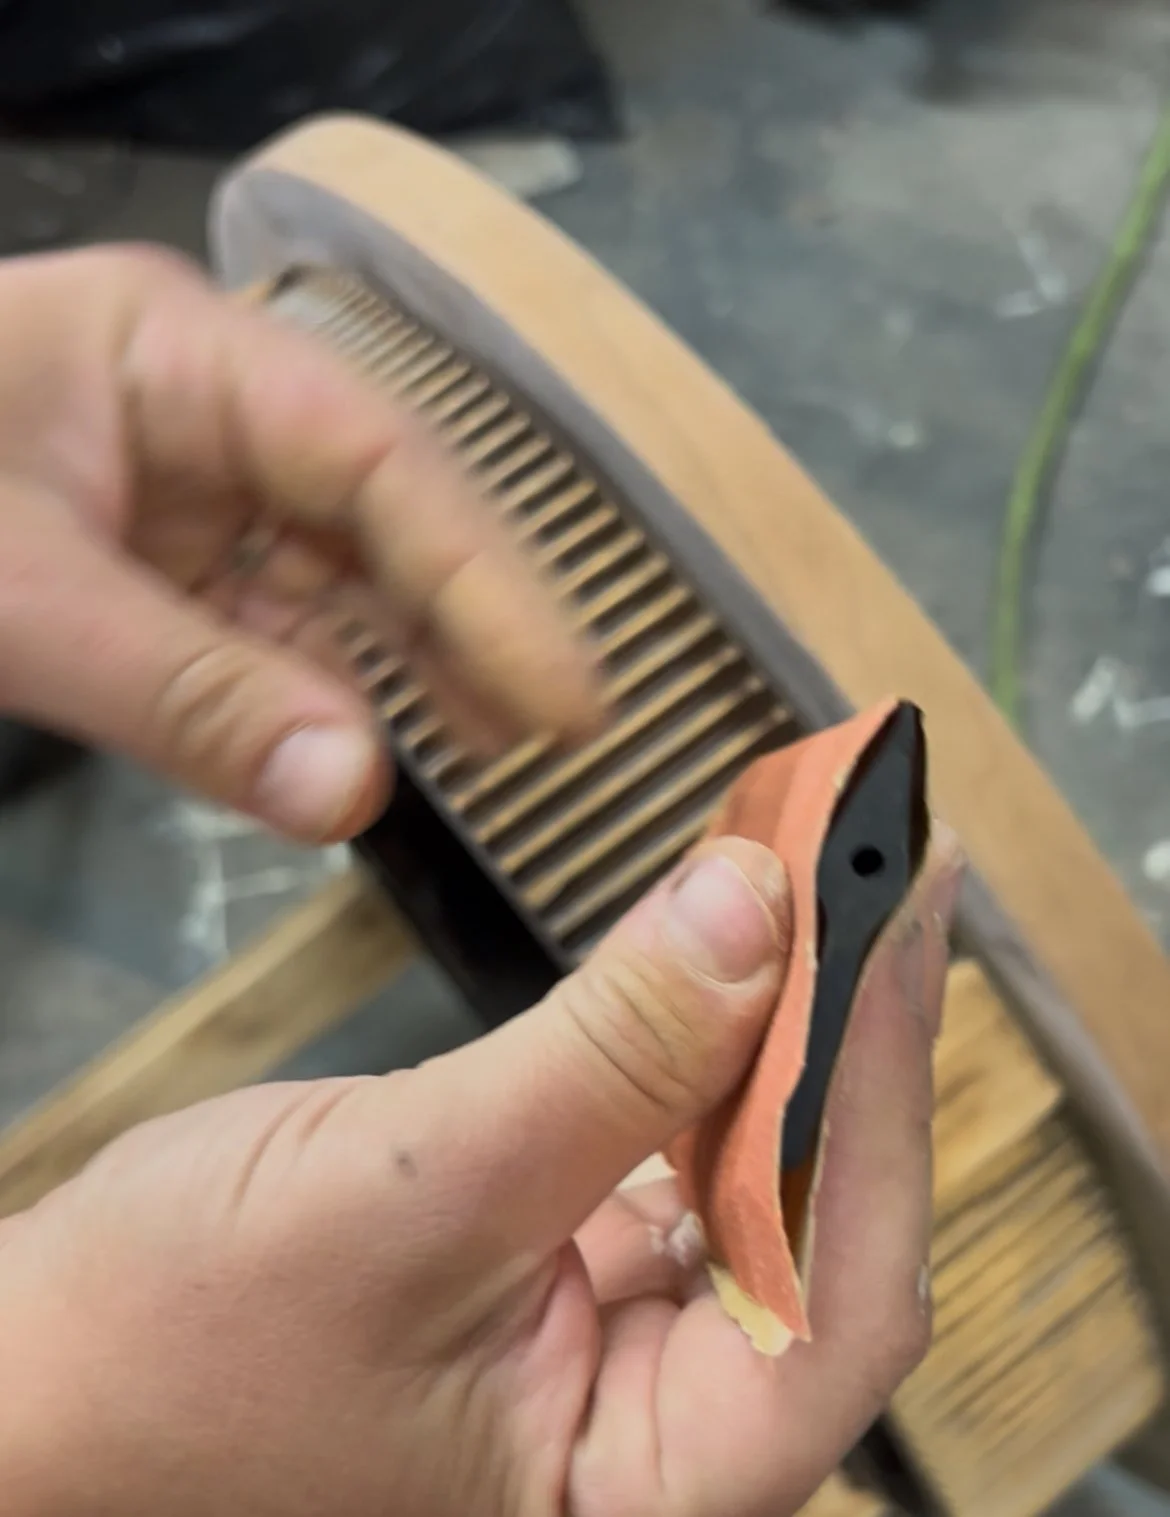
Contour sanding sponge. These are great for awkward shapes that you want to sand inbetween and are cheaper than a dremel kit. See the photo below where I had to sand some detailed ridges on a coffee table set. While it was insanely time consuming, it worked like a charm and turned out stunning.
List of my Favourite Products
If you are ready for the next steps, check out my blog on How to Paint Furniture. Not painting? Learn how to apply a Paint Wash and Top Coat!
Otherwise, leave me a comment or a question below! Thanks everyone, and good luck on your next project!