

How to Add Fluting to Furniture (Step-by-Step Tutorial)
How to Add Fluting to Furniture for a Modern, Refined Look
There’s something about fluting that instantly refines a piece of furniture. It adds subtle texture, warmth, and that designer touch that can make even a simple dresser look custom-built.
I’ve been adding fluting to a few of my pieces lately — and every time I share them on Paint It Beautiful’s Facebook page, I get the same question: “How did you add the fluting?”
So, here it is — a full breakdown of how to do it, which products I recommend, and a few pro tips to make the process smoother and cleaner.
⸻
Why Fluting Works
Depending on the vision you have for your piece, fluting can completely change the feel:
• For a neutral wood tone, it adds depth while keeping things natural and organic.
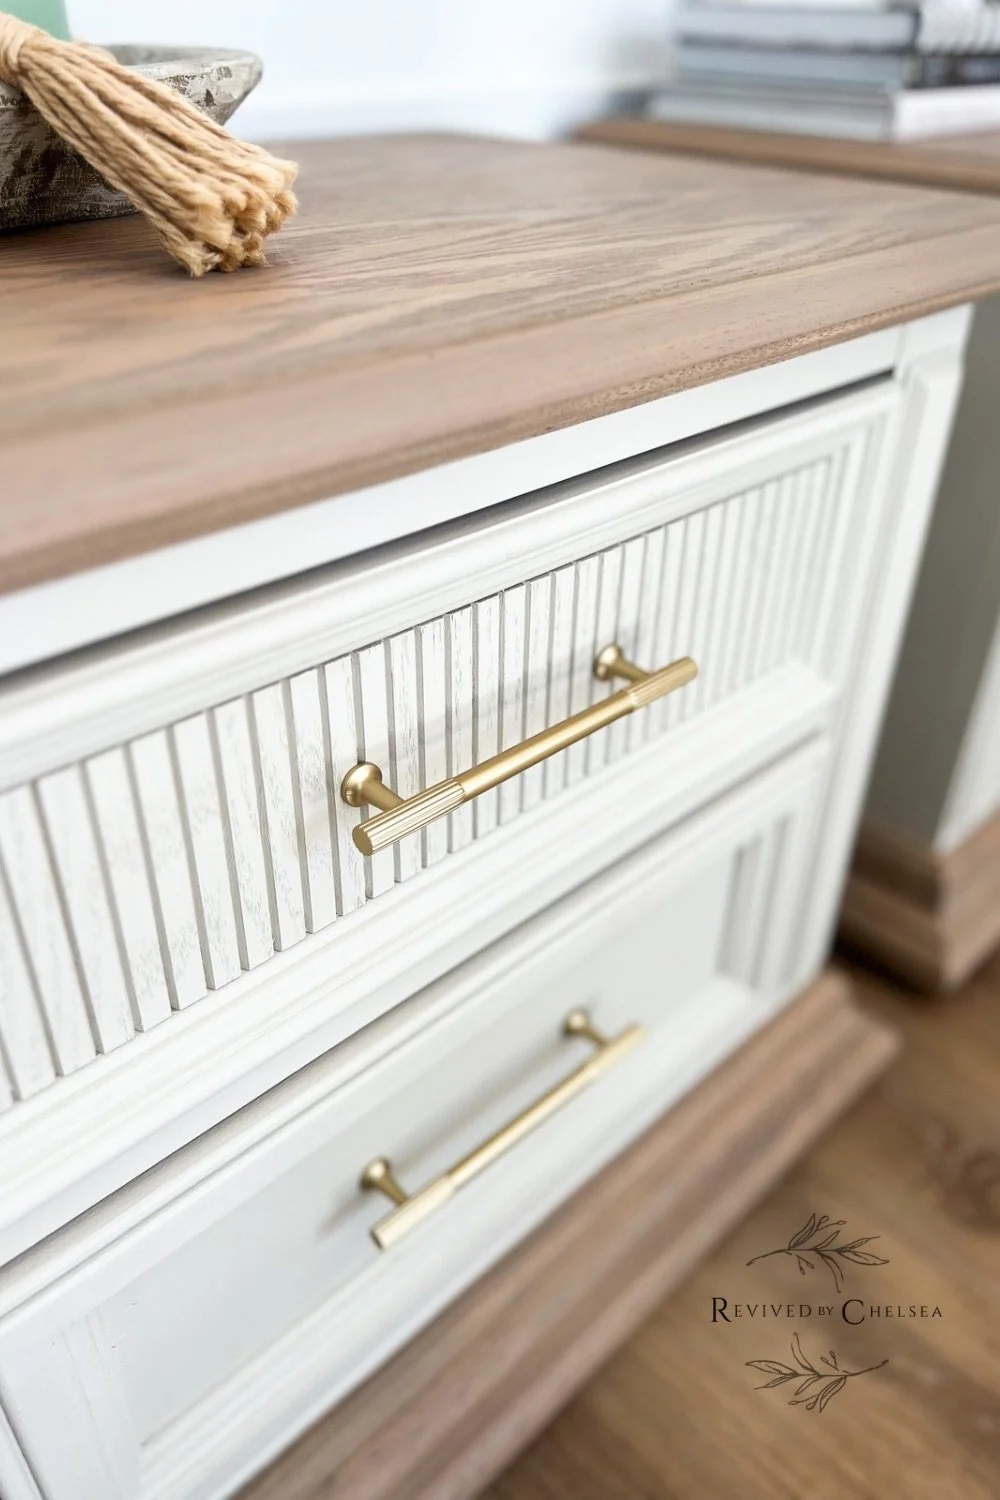
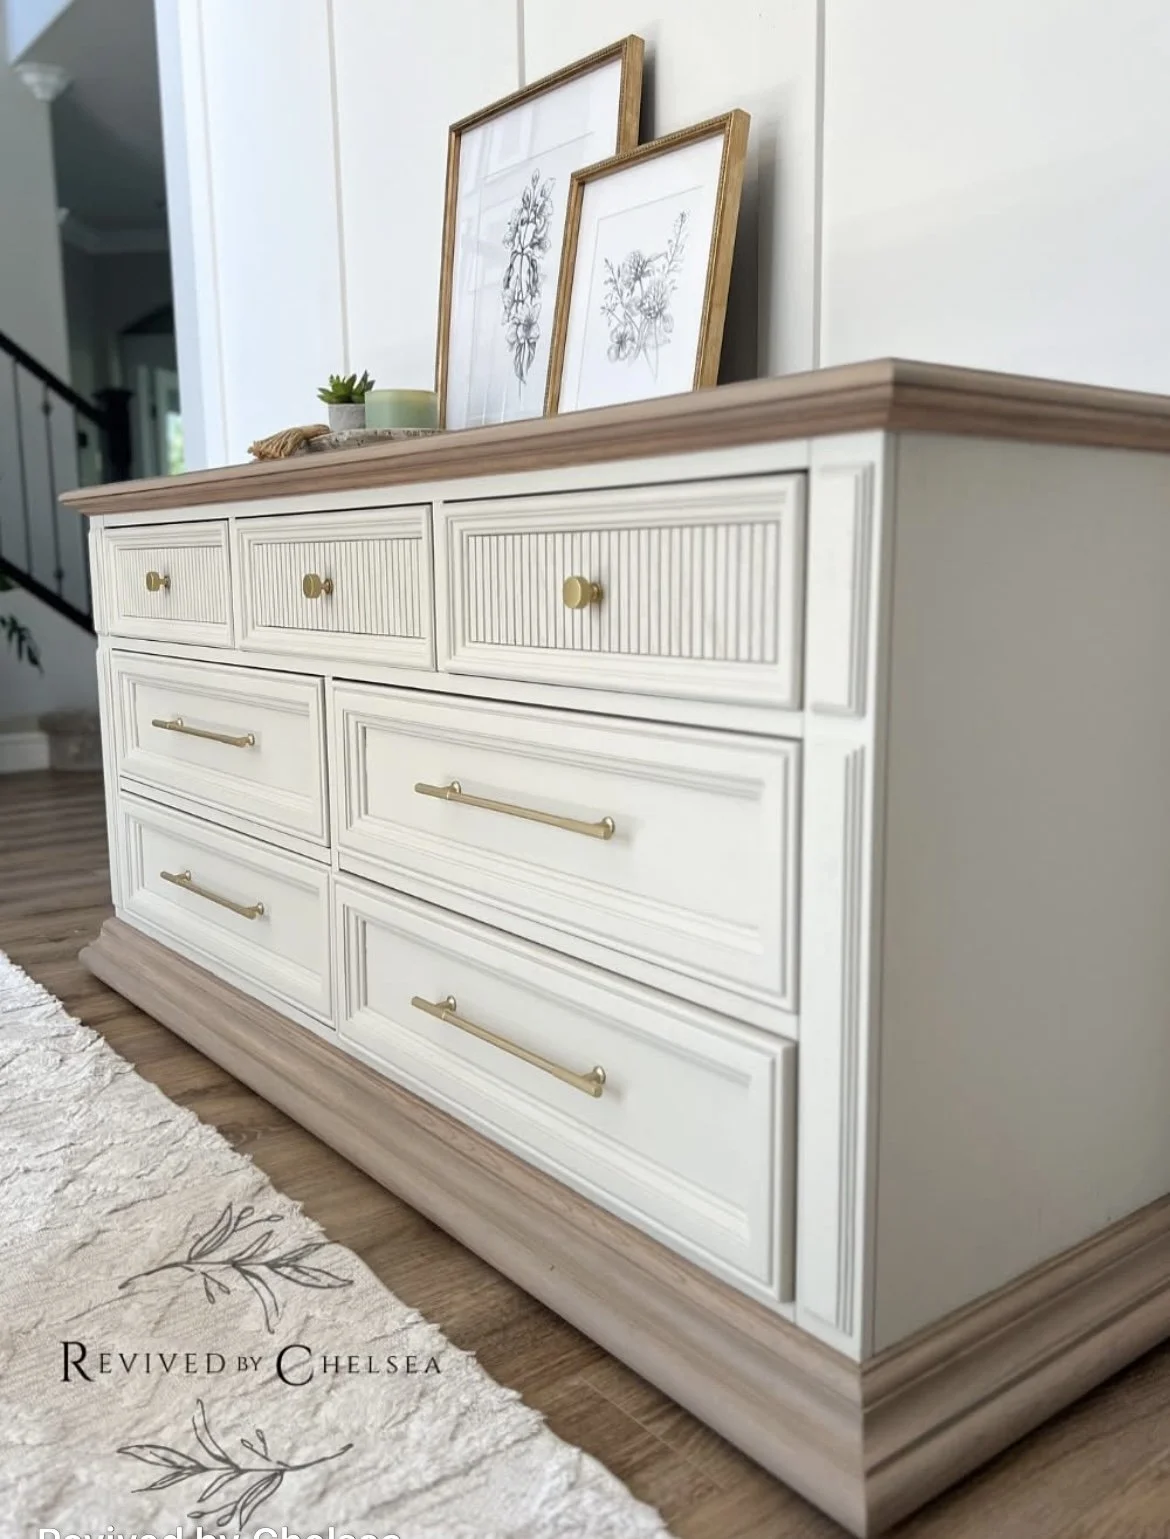
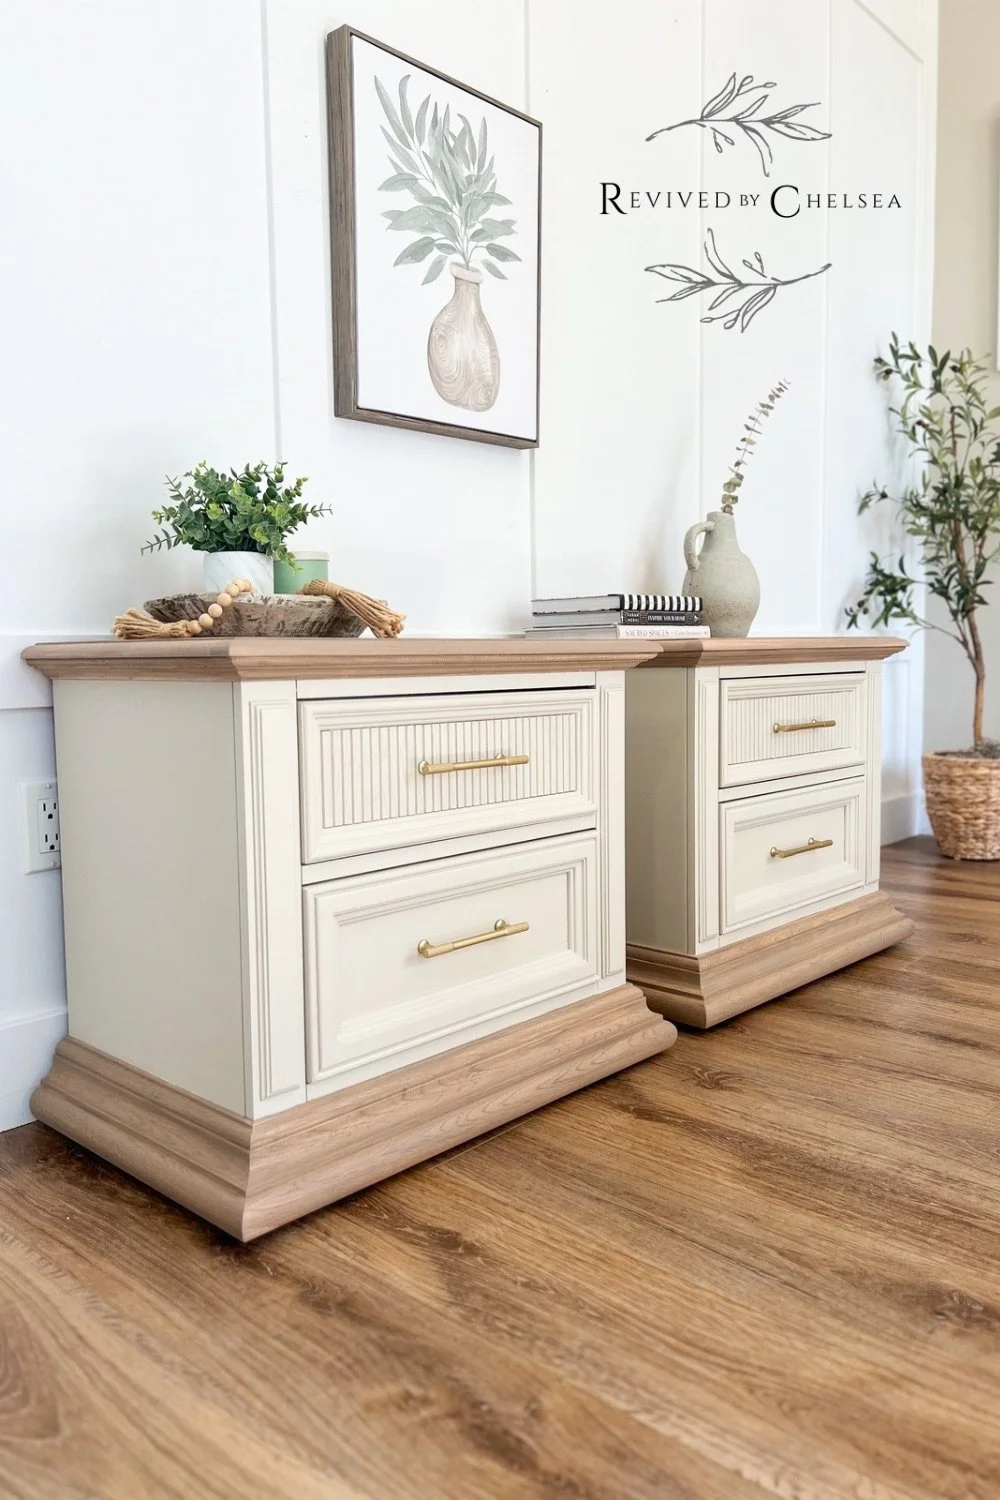
• For painted finishes, fluting creates dimension under color — it’s stunning on matte neutrals, dark moody tones, or even creamy whites.
You can keep your original wood tone like I did with this oak dresser


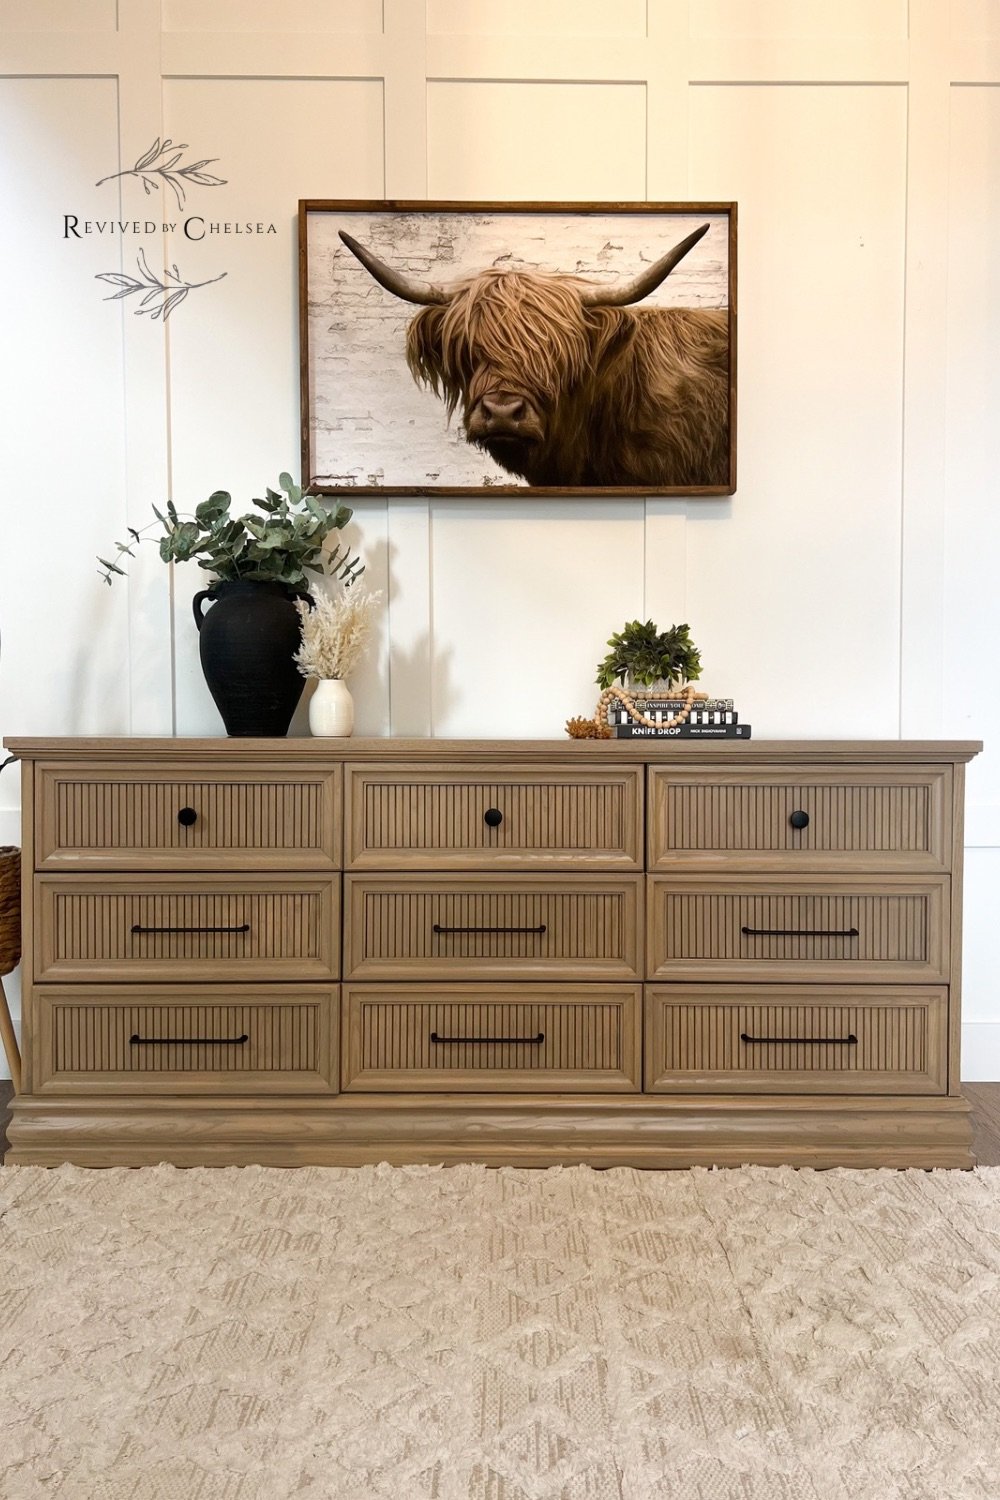
Or paint the fluting for a fresh, modern look.


If you plan to paint your piece, there are budget-friendly fluting options that work beautifully once painted — and I’ve linked a few below.
⸻
Materials I Used
As an Amazon Associate, I earn commissions from qualifying purchases.
• Fluted Panel or Pole Wrap
(Note: Fluted Panel option is slightly more affordable and ships faster — but I’m sharing both as I have used both, and the fluted panel is great if you are painting over it anyway)
• Wood glue (optional but recommended)
• Brad nailer / air nailer & Nails
• Sanding block or 220-grit paper
⸻
Step-by-Step Tutorial
Step 1: Measure your drawer fronts
Measure the width and height of each drawer you’ll be applying fluting to. You’ll want your fluting to fit snug with no visible gaps at the edges.
⸻
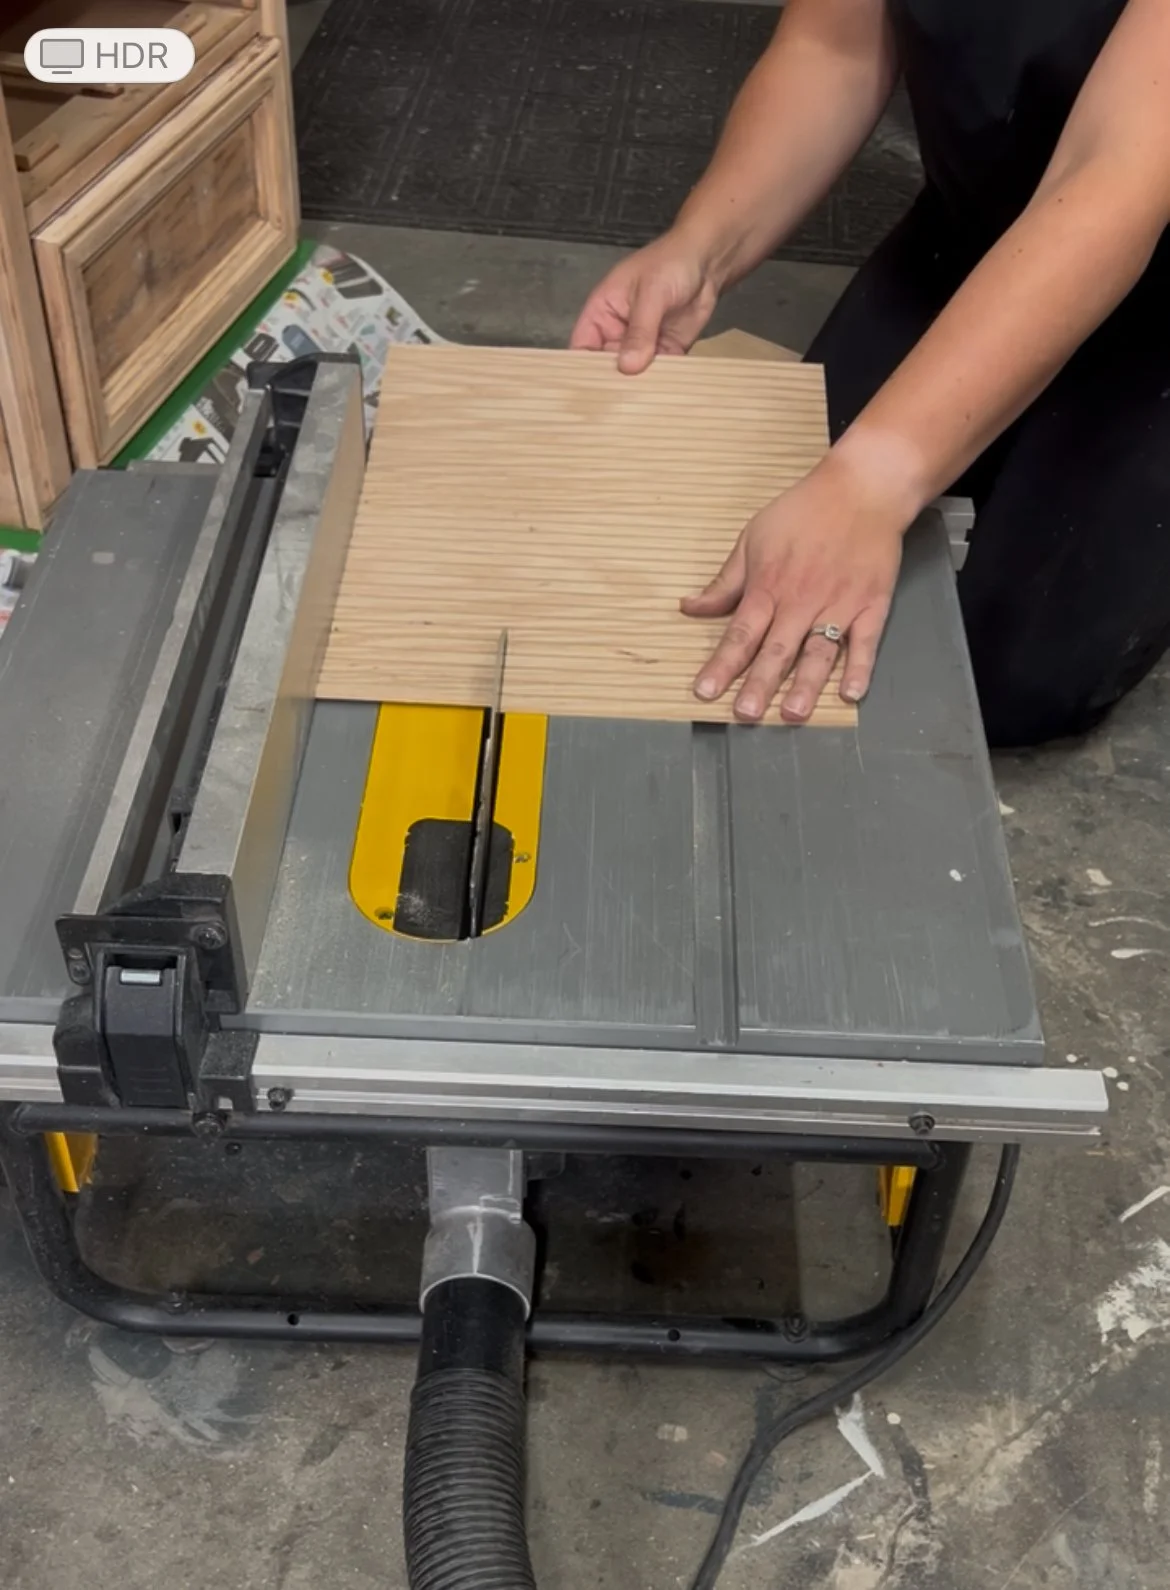
Step 2: Cut your fluting to size
Here’s my pro tip:
I recommend cutting your fluting with a miter saw while it’s still rolled up. The rolls are long (typically around 8 feet), which can be awkward to run through a table saw cleanly. Keeping it in a roll helps prevent fraying on the ends — just go slow and steady.
Once your sections are cut to the desired drawer length, use a table saw to trim the width. At this point, you can lay the fluting flat, which gives you more control for a clean, even cut.
Step 3: (Optional) Glue the fluting
Some refinishers skip this step — but since I sell my pieces, I like the extra security. Fluting can bend slightly, so glue helps ensure it’s firmly attached to the surface and won’t lift later.
If you’re refinishing for yourself and your surface is perfectly flat, you might be fine skipping the glue. Personally, I do both glue and nail for maximum durability.

Step 4: Nail it in place
Use a brad nailer (also called an air nailer) to fasten the fluting to your drawer fronts.
If you decide to glue, this step is not optional — nailing provides the structural hold that glue alone can’t guarantee.
Pro Tip: I apply painter’s tape where I plan to add nails before nailing. This helps later when you fill the holes — it keeps the wood filler from getting trapped in the grooves.

Obviously I didn’t use the pro tip with the painters tape here… 😂
Step 5: Fill and sand
After nailing, apply wood filler over the holes. The painter’s tape will make cleanup so much easier. Once dry, remove the tape and gently sand the surface to make sure everything is smooth and flush.
⸻

Step 6: Paint, stain, or paint wash
Here’s where you can personalize your piece based on your vision:
Try my Taupe Paint Wash technique.
Neutralize orange tones using my green wash method.
Going for a painted look? Check out my How to Paint Furniture guide.
Each method transforms the texture in a different way — so this is your “choose your own adventure” moment.
⸻
Final Thoughts
Adding fluting to furniture is such a simple way to take your refinished pieces to the next level. Whether you’re keeping things raw and organic or giving them a painted finish, fluting adds just enough texture to make your work look elevated and intentional.
If you’re ready to choose hardware next, stay tuned — I’ll be sharing a blog post soon on How I Select Modern Hardware (with all my favorite Amazon hardware).
Be Sure to PIN this to your Pinterest boards! Let me know what you think below, and if you have questions, I would love to help out!