

Neutralize Orange Tones on Furniture
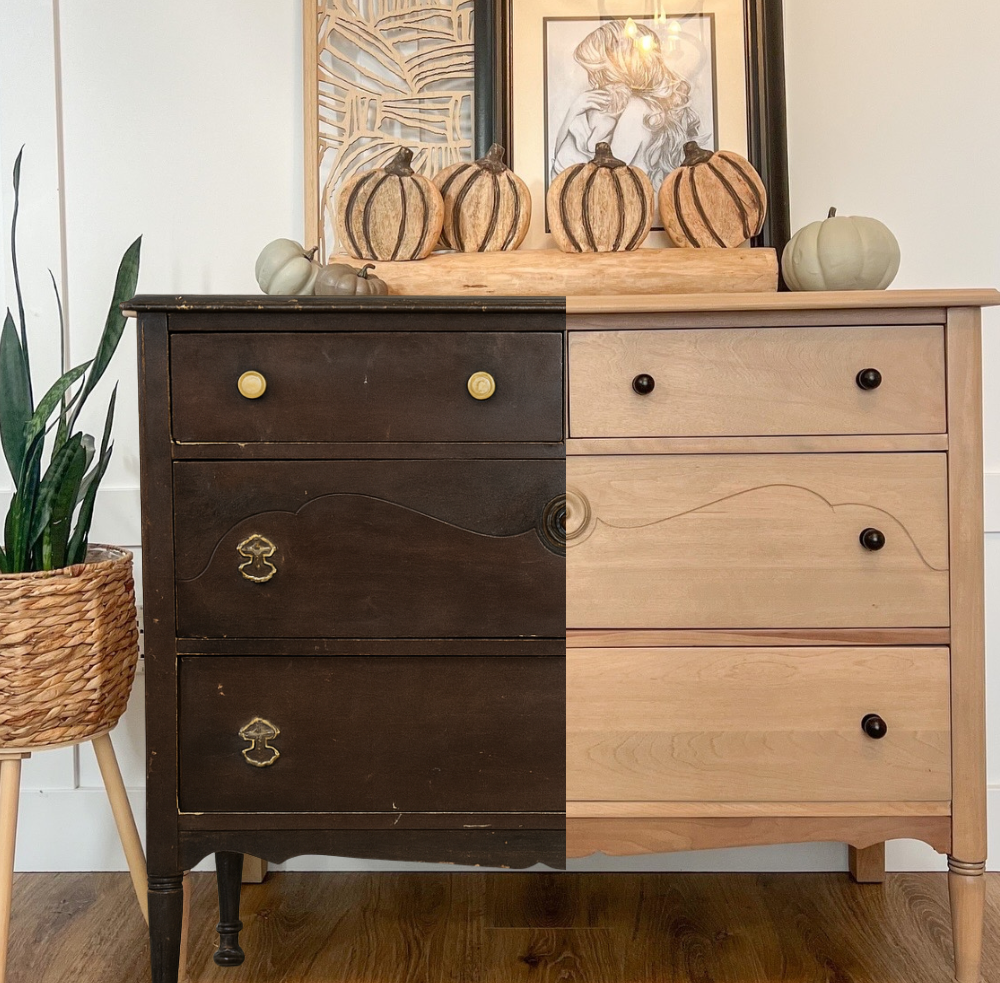
Imagine this… You have fully sanded back a GORGEOUS vintage oak dresser revealing what looks like a neutral blonde wood tone. This is going to be a focal point in your entry way. You are imagining modern wood tones with that stunning tiger oak grain… But… the second you put any kind of finish on it, you automatically see the orange poking through and it is devastating.
This is a question I have been asked 1000 times. HOW do you get oak furniture to NOT pull yellow tones!? It’s actually a really simple answer. In order to offset orange, you need to neutralize it with a complimentary colour - green. According to colour theory, when complimentary colours are mixed, they actually neutralize each other - but I’m not here to give you Interior Design colour theory 101.
This blog contains affiliate links. As an Amazon Associate, I earn commission on qualifying purchases.
Step 1:
Sand your piece down to bare bones. You can do this by stripping your piece with a furniture stripper, my favourite is Circa 1870. It is a gel consistency, the least smelly, and works AMAZING.
If you are using a sander, I recommend this one! Start with 80 grit, and then work your way up to make sure you get the “pigtails” out. 80-120-180. Wipe back excess dust.
Step 2:
The most painful part is over! Once you are confident with the state of your piece, all the piggy swirls are gone, now you are ready for your paint wash!
Let’s talk ratios. A lot of people recommend 50:50…. but, I usually lean more to 60:40 - water:paint. You don’t want the paint to cover the wood grain. I always remind myself that the goal is to neutralize - not to cover. If it’s not enough, you can always add more.
When choosing a green, you want to lean into lighter shades. This is my favourite colour!
A quick tip: Paint wash can dry quite quickly. I always have my mister (this one!) close by to reactivate the wash so I can wipe back excess with lint free cloths (These are the best).
Step 3:
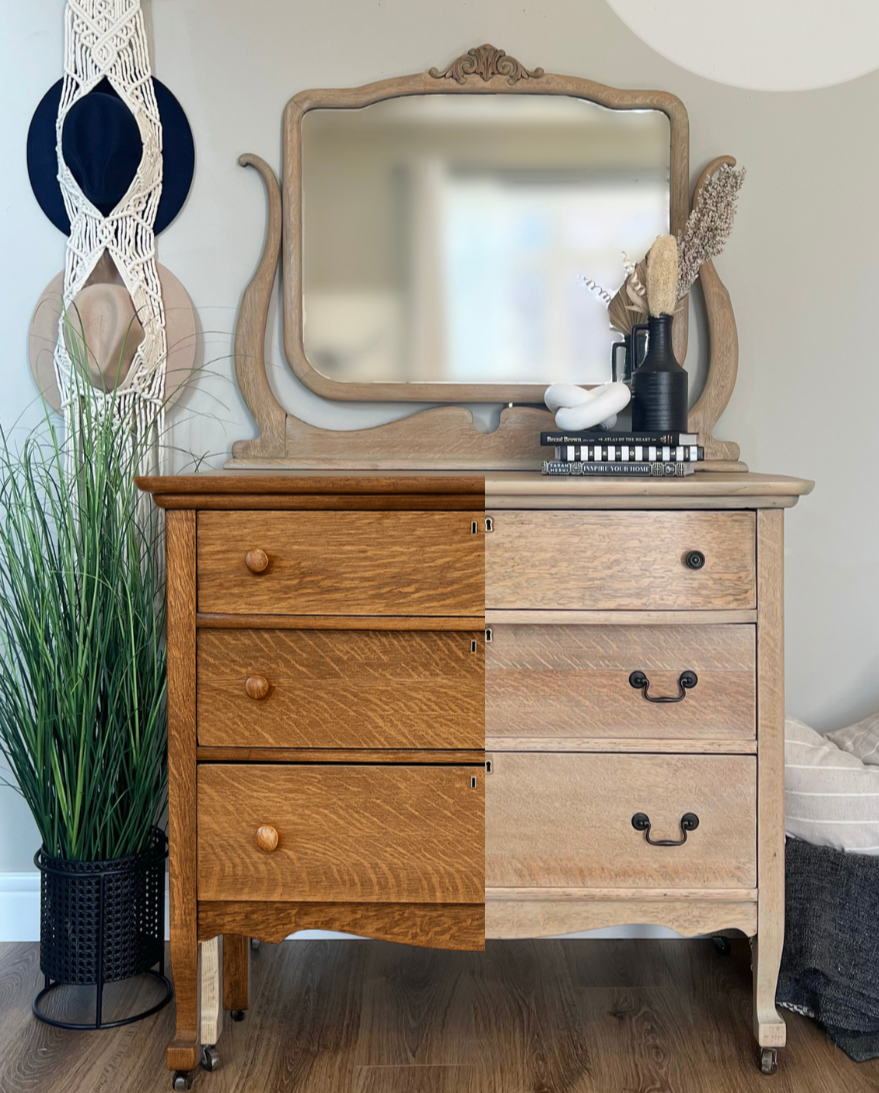
Once you have completely covered your piece with paint wash and wiped back the excess, let it dry for about 12 hours. Once it is dry, feel the grain. If it is a bit rough, give it a light sand with 400+ grit to smooth it out. Wipe off any dust. Now you can apply your next coat! The next coat can be a poly to seal it up to leave a light, natural tone like the photos above, or you can apply a stain overtop of this layer.
Optional Step 4:
If you want to add a stain (I highly recommend THIS brand), you want to do that before your top coat. Remember, the green neutralized the tones so your stain choice will really come through here. You don’t have to worry about orange tones at all.
Follow the instructions on the can, and then apply a top coat (This is my favourite).
As you can tell, this is one of my favourite finishes. It is light and airy, protected, and ready for another 100 years (hopefully!)

BONUS CONTENT:
Furniture Wax!
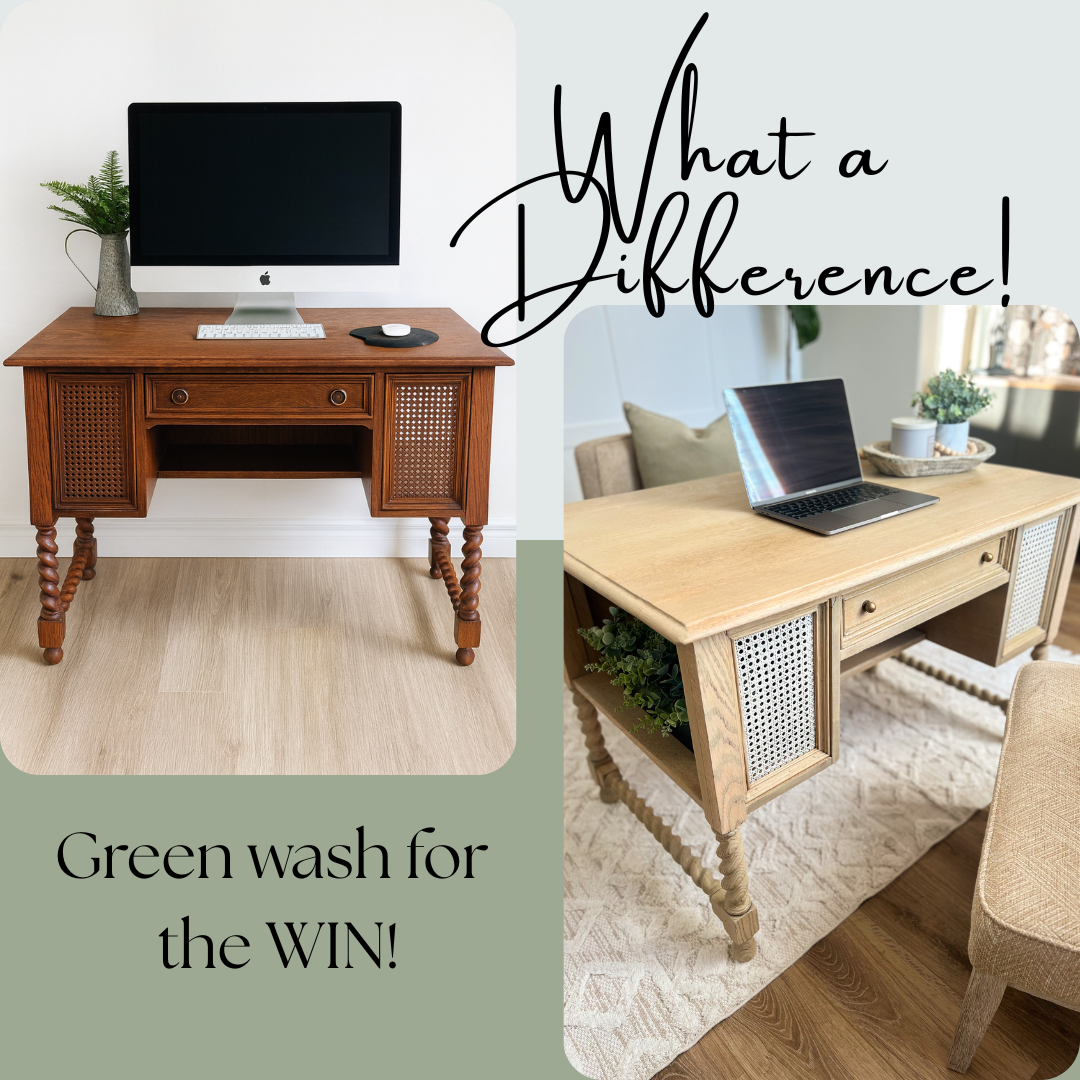
Ok, I am going to do a blog about adding furniture wax next, but for now, I wanted to also show this piece I did. Using green wash first, I then added furniture wax overtop as my finishing medium. As you can tell from the image, this adds a beautiful, aged, rustic look to your vintage furniture. It is always a quick sell, and is so timeless.
Let me know if you have used a green wash before, or if you have any questions in the comments. Thanks for following along!